おじさんは待っていました。そして正直うれしいです。 これまでも結構設定に苦労していましたが、これでようやく容易に準備できる環境になったと言ってもいいでしょう。
TensorFlow本家がようやくRaspberryPiがサポートしてくれました。

インストールに関しては以下でFAです。
【本家のリンク参考】 Installing TensorFlow on Raspbian | TensorFlow
他にもエントリー書かれている方がいますのでそちらを御覧ください。
嬉しさのあまり、自分もエントリを書きますが、公式となにも変わらないと思いますので…
一応、今回の作業で
- TensorFlow → 1.9
- keras → 2.2.2
- OpenCV → 3.4.2
となっています。最後にコマンドをまとめてあるので必要があればみてください。
インストールの環境
今回は最新のRaspbianを使用しました。
ダウンロードしたファイルは2018-06-27-raspbian-stretch.zipとなります。ひとしきりインストールの関連作業を行います。
インストールしたバージョンは以下のようになっていました。
$ lsb_release -a
No LSB modules are available.
Distributor ID: Raspbian
Description:    Raspbian GNU/Linux 9.4 (stretch)
Release:        9.4
Codename:       stretch
必要条件としては
Raspberry Pi devices running Raspbian 9.0 or higher
とのことだったので問題はなさそうです。
pipもインストール時にこのようになっているので問題ありません。
Pythonは2系でも3系でも問題はなさそうなので、今回は3系でやってみます。
$ pip --version
pip 9.0.1 from /usr/lib/python2.7/dist-packages (python 2.7)

$ pip3 --version
pip 9.0.1 from /usr/lib/python3/dist-packages (python 3.5)
インストール作業
あとはインストールをするだけです。
TensorFlowのインストールにはATLASというライブラリが必要(依存する)ということなので
ライブラリをインストールしてから、TensorFlowをのインストールを行うことになります。
【ATLAS】 Automatically Tuned Linear Algebra Software (ATLAS)
$ sudo apt install libatlas-base-dev
$ pip3 install tensorflow
これで終わりです!自分の環境では有線のネット接続で5分くらいで終わりました。3系のインストールのほうが依存関係のパッケージがprebuildされているので早いということも書いてありましたので3系使ったほうがいいと思います。
実行してみる
REPL環境でimportの実行を行ってみると…おやあ?
$ python3
Python 3.5.3 (default, Jan 19 2017, 14:11:04)
[GCC 6.3.0 20170124] on linux
Type "help", "copyright", "credits" or "license" for more information.
>>> import tensorflow as tf
/usr/lib/python3.5/importlib/_bootstrap.py:222: RuntimeWarning: compiletime version 3.4 of module 'tensorflow.python.framework.fast_tensor_util' does not match runtime version 3.5
  return f(*args, **kwds)
/usr/lib/python3.5/importlib/_bootstrap.py:222: RuntimeWarning: builtins.type size changed, may indicate binary incompatibility. Expected 432, got 412
  return f(*args, **kwds)
/usr/lib/python3.5/importlib/_bootstrap.py:222: RuntimeWarning: numpy.dtype size changed, may indicate binary incompatibility. Expected 56, got 52
  return f(*args, **kwds)
自分も以前にこんなメッセージ見たことあるぞw。
ドキュメントにもこんな風に書かれています。
If you're running with Python 3.5, you may see a warning when you first import TensorFlow. This is not an error, and TensorFlow should continue to run with no problems, despite the log message.
Python3.5だとimport時にWarningがでるよって…自分で作業していたときにも同じようなメッセージが表示されていたので、そのときに使用したバイナリと同じものがpip経由でインストールされているものだったのでしょう。ドキュメントには実行に問題ないということが書いてあるのでそのままテストコードを入力してみます。
【参考:pythonがバージョン3.4とかそういう件だった話】
$ python3
Python 3.5.3 (default, Jan 19 2017, 14:11:04)
[GCC 6.3.0 20170124] on linux
Type "help", "copyright", "credits" or "license" for more information.
>>> import tensorflow as tf
/usr/lib/python3.5/importlib/_bootstrap.py:222: RuntimeWarning: compiletime version 3.4 of module 'tensorflow.python.framework.fast_tensor_util' does not match runtime version 3.5
  return f(*args, **kwds)
/usr/lib/python3.5/importlib/_bootstrap.py:222: RuntimeWarning: builtins.type size changed, may indicate binary incompatibility. Expected 432, got 412
  return f(*args, **kwds)
/usr/lib/python3.5/importlib/_bootstrap.py:222: RuntimeWarning: numpy.dtype size changed, may indicate binary incompatibility. Expected 56, got 52
  return f(*args, **kwds)
>>> hello = tf.constant('Hello, TensorFlow!')
>>> sess = tf.Session()
>>> print(sess.run(hello))
b'Hello, TensorFlow!'
>>>
一応問題なく実行してくれたようです。
念の為バージョンを確認すると
>>> tf.__version__
'1.9.0'
最新バージョンのようです。
ついでにkerasもインストールしてみます。
$ sudo pip3 install keras
REPL環境で実行してみますが問題はなさそうです。
>>> import keras
Using TensorFlow backend.
>>> keras.__version__
'2.2.2'
さらについでにOpenCV3.4.2をインストール
$ wget https://github.com/mt08xx/files/blob/master/opencv-rpi/libopencv3_3.4.2-20180709.1_armhf.deb
$ sudo apt install -y ./libopencv3_3.4.0-20180115.1_armhf.deb
$ sudo ldconfig
Python 3.5.3 (default, Jan 19 2017, 14:11:04)
[GCC 6.3.0 20170124] on linux
Type "help", "copyright", "credits" or "license" for more information.
>>> import cv2
>>> cv2.__version__
'3.4.2'
>>>
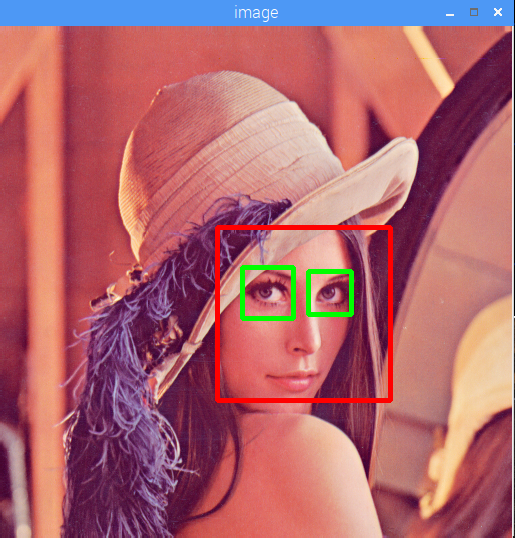
認識なども問題ありません。

こちらもすんなりインストールできました。以前のTensorFlowとKerasを使用したコードを実行してみます。コードは以下のようなものです。
sample.py
from keras.models import Sequential
from keras.layers import Activation, Dense, Dropout
from keras.utils.np_utils import to_categorical
from keras.optimizers import Adagrad
from keras.optimizers import Adam
import numpy as np
from PIL import Image
import os

image_list = []
label_list = []

# トレーニングデータを読み込む
for dir in os.listdir("data/train"):

    traindir = "data/train/" + dir
    if os.path.isdir(traindir) == False:
        continue

    label = 0              # 正解ラベル

    if dir == "apple":
        label = 0          # りんごの場合は、0
    elif dir == "orange":
        label = 1          # オレンジの場合は、1

    for file in os.listdir(traindir):
        if file != ".DS_Store":

            label_list.append(label)            # 正解ラベルを配列に入れる

            filepath = traindir + "/" + file  # ファイルパス

            resized_img = Image.open(filepath).resize((25, 25))                                                    # 画像を25x25にリサイズする
            image = np.array(resized_img)                                                                       # 25x25の2次元配列にする→[[R,G,B], [R,G,B]...]
            image = image.transpose(2, 0, 1)                                                                 # 配列を次元を変換する→[[R,R,R,...], [G,G,G,...], [B,B,B,...]]
            image = image.reshape(1, image.shape[0] * image.shape[1] * image.shape[2]).astype("float32")[0]     # 1次元配列に変換→[R,R,R,...,G,G,G,...,B,B,B]
            image_list.append(image / 255.)                                                            # 0.0〜1.0までの値にして配列に入れる

image_list = np.array(image_list)       # 画像リストをnumpy配列に変換

Y = to_categorical(label_list)          # 正解ラベルを配列にする(0→[1,0], 1→[0,1])

# 層を構築
model = Sequential()
# 入力層
model.add(Dense(200, input_dim=1875))
model.add(Activation("relu"))
model.add(Dropout(0.2))

# 隠れ層
model.add(Dense(200))
model.add(Activation("relu"))
model.add(Dropout(0.2))

# 出力層
model.add(Dense(2))
model.add(Activation("softmax"))

# オプティマイザにAdamを使用
opt = Adam(lr=0.001)
model.compile(loss="categorical_crossentropy", optimizer=opt, metrics=["accuracy"])
# nb_epoch: 学習回数
# batch_size: 1度に処理する分量(GPUモードの際は、メモリ制限がある場合がある)
model.fit(image_list, Y, nb_epoch=1500, batch_size=100, validation_split=0.1)
# model.fit(image_list, Y, nb_epoch=10, batch_size=100, validation_split=0.1)

total = 0.
ok_count = 0.

for dir in os.listdir("data/test"):

    testdir = "data/test/" + dir
    if os.path.isdir(testdir) == False:
        continue

    label = 0

    if dir == "apple":
        label = 0          # りんごの場合は、0
    elif dir == "orange":
        label = 1          # オレンジの場合は、1

    for file in os.listdir(testdir):
        if file != ".DS_Store":
            label_list.append(label)
            filepath = testdir + "/" + file

            resized_img = Image.open(filepath).resize((25, 25))
            image = np.array(resized_img)
            image = image.transpose(2, 0, 1)
            image = image.reshape(1, image.shape[0] * image.shape[1] * image.shape[2]).astype("float32")[0]

            # 予測する
            print(filepath)
            result = model.predict_classes(np.array([image / 255.]))
            print("label:", label, "result:", result[0])

            total += 1.

            if label == result[0]:
                ok_count += 1.

print(ok_count / total * 100, "%")
実行結果
$ python3 07tf.py
Using TensorFlow backend.
/usr/lib/python3.5/importlib/_bootstrap.py:222: RuntimeWarning: compiletime version 3.4 of module 'tensorflow.python.framework.fast_tensor_util' does not match runtime version 3.5
  return f(*args, **kwds)
/usr/lib/python3.5/importlib/_bootstrap.py:222: RuntimeWarning: builtins.type size changed, may indicate binary incompatibility. Expected 432, got 412
  return f(*args, **kwds)
/usr/lib/python3.5/importlib/_bootstrap.py:222: RuntimeWarning: numpy.dtype size changed, may indicate binary incompatibility. Expected 56, got 52
  return f(*args, **kwds)
07tf.py:65: UserWarning: The `nb_epoch` argument in `fit` has been renamed `epochs`.
  model.fit(image_list, Y, nb_epoch=1500, batch_size=100, validation_split=0.1)
Train on 35 samples, validate on 4 samples
Epoch 1/1500
35/35 [==============================] - 3s 86ms/step - loss: 0.7891 - acc: 0.5143 - val_loss: 0.0169 - val_acc: 1.0000
Epoch 2/1500
35/35 [==============================] - 0s 3ms/step - loss: 2.5033 - acc: 0.4286 - val_loss: 1.6119 - val_acc: 0.0000e+00
Epoch 3/1500

(中略)

Epoch 1500/1500
35/35 [==============================] - 0s 3ms/step - loss: 1.2697e-05 - acc: 1.0000 - val_loss: 1.1921e-07 - val_acc: 1.0000
data/test/orange/8242_1.jpg
label: 1 result: 1
data/test/orange/1152194_orange_isolated_on_white_background.jpg
label: 1 result: 1
data/test/orange/images (1).jpeg
label: 1 result: 1
data/test/orange/DKCcTzZXUAA0ckm.jpg
label: 1 result: 1
data/test/apple/81306024002557.jpg
label: 0 result: 0
data/test/apple/81306024002554.jpg
label: 0 result: 0
data/test/apple/1212043top.jpg
label: 0 result: 0
data/test/apple/1757f226647a6f1.jpg
label: 0 result: 0
100.0 %
こちらも無事に実行されています。
終わりに
過去の苦労がこれで解消されていくのかなと思います。 苦労が無駄だとは思いませんが、このくらい簡単になるとRaspberryPiのこの分野での存在感が高まってくるような気がします。
今回のインストール作業
$ sudo apt install libatlas-base-dev
$ pip3 install tensorflow
$ sudo pip3 install keras
$ wget https://github.com/mt08xx/files/blob/master/opencv-rpi/libopencv3_3.4.2-20180709.1_armhf.deb
$ sudo apt install -y ./libopencv3_3.4.0-20180115.1_armhf.deb
$ sudo ldconfig
【参考】