(続)Microsoft Emotion APIをRaspberryPiで使用してみる【picameraと連携】
これまでのエントリーでMicrosoft Emotion APIの使い方がわかったことに味を占めてRaspberry Piのカメラモジュールで撮影した画像を送ることにします。これまでcameraモジュールは持っていたんですが、宝の持ち腐れだったので。
自分の持っていたcameraモジュールはこれになります。
いろいろとカメラモジュールはありますが、自分の持っているRaspberryPiに対応したモジュールでいいんじゃないかと思います。ただし、NoIRとついているものは赤外線カメラなのでその点だけ気を付けてください。(使い方は変わらないみたいですが。)
Raspberry Piのcameraモジュールを有効化する
まずはcameraモジュールを使用できるようにraspi-configで設定します。
$ sudo raspi-config
以下のようなメニュー画面になります。

この中から【6.Enable Camera】を選択します。

cameraを有効化するか否かを尋ねられるので、

【Enable】を選択します。

選択するともとのメニュー画面に戻ります。

メニューの下にある【Finish】を押して設定を終了させようとすると

再起動を求められるので、再起動をします。

これで正常にcameraモジュールを有効化できました。
cameraモジュールのテストを行う。
有効化したら以下のコマンドを実行してみます。
$ raspistill -o image.jpg
エラーが発生しなければOKです。 念のため生成された画像がjpegファイルになっているか確認してみます。
$ file image.jpg
image.jpg: JPEG image data, Exif standard: [TIFF image data, big-endian, direntries=10, height=0, manufacturer=RaspberryPi, model=RP_ov5647, xresolution=156, yresolution=164, resolutionunit=2, datetime=2016:10:24 23:36:00, width=0], baseline, precision 8, 720x480, frames 3
fileコマンドはファイルの解析ができるコマンドです。 デフォルト設定では720x480サイズで撮影され、Exif情報もちゃんと入っているので問題無いようです。
raspistillは静止画をキャプチャするコマンドですが、他にもraspividという動画撮影用のコマンドや圧縮をかけずにキャプチャを行うようなraspiyuvというコマンドも存在します。これらコマンドはシャッタースピードやホワイトバランス、簡易なフィルタなどをかける事ができるかなり多機能なコマンドになっています。このコマンドだけでもタイムラプスを取ることができるので、別途そのあたりも調べてみたいと思います。
それぞれのコマンドのhelpオプションは以下の通り。
$ raspistill --help
Runs camera for specific time, and take JPG capture at end if requested

usage: raspistill [options]

Image parameter commands

-?, --help      : This help information
-w, --width     : Set image width <size>
-h, --height    : Set image height <size>
-q, --quality   : Set jpeg quality <0 to 100>
-r, --raw       : Add raw bayer data to jpeg metadata
-o, --output    : Output filename <filename> (to write to stdout, use '-o -'). If not specified, no file is saved
-l, --latest    : Link latest complete image to filename <filename>
-v, --verbose   : Output verbose information during run
-t, --timeout   : Time (in ms) before takes picture and shuts down (if not specified, set to 5s)
-th, --thumb    : Set thumbnail parameters (x:y:quality) or none
-d, --demo      : Run a demo mode (cycle through range of camera options, no capture)
-e, --encoding  : Encoding to use for output file (jpg, bmp, gif, png)
-x, --exif      : EXIF tag to apply to captures (format as 'key=value') or none
-tl, --timelapse        : Timelapse mode. Takes a picture every <t>ms. %d == frame number (Try: -o img_%04d.jpg)
-fp, --fullpreview      : Run the preview using the still capture resolution (may reduce preview fps)
-k, --keypress  : Wait between captures for a ENTER, X then ENTER to exit
-s, --signal    : Wait between captures for a SIGUSR1 from another process
-g, --gl        : Draw preview to texture instead of using video render component
-gc, --glcapture        : Capture the GL frame-buffer instead of the camera image
-set, --settings        : Retrieve camera settings and write to stdout
-cs, --camselect        : Select camera <number>. Default 0
-bm, --burst    : Enable 'burst capture mode'
-md, --mode     : Force sensor mode. 0=auto. See docs for other modes available
-dt, --datetime : Replace output pattern (%d) with DateTime (MonthDayHourMinSec)
-ts, --timestamp        : Replace output pattern (%d) with unix timestamp (seconds since 1970)
-fs, --framestart       : Starting frame number in output pattern(%d)
-rs, --restart  : JPEG Restart interval (default of 0 for none)

Preview parameter commands

-p, --preview   : Preview window settings <'x,y,w,h'>
-f, --fullscreen        : Fullscreen preview mode
-op, --opacity  : Preview window opacity (0-255)
-n, --nopreview : Do not display a preview window

Image parameter commands

-sh, --sharpness        : Set image sharpness (-100 to 100)
-co, --contrast : Set image contrast (-100 to 100)
-br, --brightness       : Set image brightness (0 to 100)
-sa, --saturation       : Set image saturation (-100 to 100)
-ISO, --ISO     : Set capture ISO
-vs, --vstab    : Turn on video stabilisation
-ev, --ev       : Set EV compensation - steps of 1/6 stop
-ex, --exposure : Set exposure mode (see Notes)
-awb, --awb     : Set AWB mode (see Notes)
-ifx, --imxfx   : Set image effect (see Notes)
-cfx, --colfx   : Set colour effect (U:V)
-mm, --metering : Set metering mode (see Notes)
-rot, --rotation        : Set image rotation (0-359)
-hf, --hflip    : Set horizontal flip
-vf, --vflip    : Set vertical flip
-roi, --roi     : Set region of interest (x,y,w,d as normalised coordinates [0.0-1.0])
-ss, --shutter  : Set shutter speed in microseconds
-awbg, --awbgains       : Set AWB gains - AWB mode must be off
-drc, --drc     : Set DRC Level (see Notes)
-st, --stats    : Force recomputation of statistics on stills capture pass
-a, --annotate  : Enable/Set annotate flags or text
-3d, --stereo   : Select stereoscopic mode
-dec, --decimate        : Half width/height of stereo image
-3dswap, --3dswap       : Swap camera order for stereoscopic
-ae, --annotateex       : Set extra annotation parameters (text size, text colour(hex YUV), bg colour(hex YUV))


Notes

Exposure mode options :
off,auto,night,nightpreview,backlight,spotlight,sports,snow,beach,verylong,fixedfps,antishake,fireworks

AWB mode options :
off,auto,sun,cloud,shade,tungsten,fluorescent,incandescent,flash,horizon

Image Effect mode options :
none,negative,solarise,sketch,denoise,emboss,oilpaint,hatch,gpen,pastel,watercolour,film,blur,saturation,colourswap,washedout,posterise,colourpoint,colourbalance,cartoon

Metering Mode options :
average,spot,backlit,matrix

Dynamic Range Compression (DRC) options :
off,low,med,high

Preview parameter commands

-gs, --glscene  : GL scene square,teapot,mirror,yuv,sobel
-gw, --glwin    : GL window settings <'x,y,w,h'>
$ raspivid --help
Display camera output to display, and optionally saves an H264 capture at requested bitrate

usage: raspivid [options]

Image parameter commands

-?, --help      : This help information
-w, --width     : Set image width <size>. Default 1920
-h, --height    : Set image height <size>. Default 1080
-b, --bitrate   : Set bitrate. Use bits per second (e.g. 10MBits/s would be -b 10000000)
-o, --output    : Output filename <filename> (to write to stdout, use '-o -')
-v, --verbose   : Output verbose information during run
-t, --timeout   : Time (in ms) to capture for. If not specified, set to 5s. Zero to disable
-d, --demo      : Run a demo mode (cycle through range of camera options, no capture)
-fps, --framerate       : Specify the frames per second to record
-e, --penc      : Display preview image *after* encoding (shows compression artifacts)
-g, --intra     : Specify the intra refresh period (key frame rate/GoP size). Zero to produce an initial I-frame and then just P-frames.
-pf, --profile  : Specify H264 profile to use for encoding
-td, --timed    : Cycle between capture and pause. -cycle on,off where on is record time and off is pause time in ms
-s, --signal    : Cycle between capture and pause on Signal
-k, --keypress  : Cycle between capture and pause on ENTER
-i, --initial   : Initial state. Use 'record' or 'pause'. Default 'record'
-qp, --qp       : Quantisation parameter. Use approximately 10-40. Default 0 (off)
-ih, --inline   : Insert inline headers (SPS, PPS) to stream
-sg, --segment  : Segment output file in to multiple files at specified interval <ms>
-wr, --wrap     : In segment mode, wrap any numbered filename back to 1 when reach number
-sn, --start    : In segment mode, start with specified segment number
-sp, --split    : In wait mode, create new output file for each start event
-c, --circular  : Run encoded data through circular buffer until triggered then save
-x, --vectors   : Output filename <filename> for inline motion vectors
-cs, --camselect        : Select camera <number>. Default 0
-set, --settings        : Retrieve camera settings and write to stdout
-md, --mode     : Force sensor mode. 0=auto. See docs for other modes available
-if, --irefresh : Set intra refresh type
-fl, --flush    : Flush buffers in order to decrease latency
-pts, --save-pts        : Save Timestamps to file for mkvmerge
-cd, --codec    : Specify the codec to use - H264 (default) or MJPEG
-lev, --level   : Specify H264 level to use for encoding


H264 Profile options :
baseline,main,high


H264 Level options :
4,4.1,4.2

H264 Intra refresh options :
cyclic,adaptive,both,cyclicrows

Preview parameter commands

-p, --preview   : Preview window settings <'x,y,w,h'>
-f, --fullscreen        : Fullscreen preview mode
-op, --opacity  : Preview window opacity (0-255)
-n, --nopreview : Do not display a preview window

Image parameter commands

-sh, --sharpness        : Set image sharpness (-100 to 100)
-co, --contrast : Set image contrast (-100 to 100)
-br, --brightness       : Set image brightness (0 to 100)
-sa, --saturation       : Set image saturation (-100 to 100)
-ISO, --ISO     : Set capture ISO
-vs, --vstab    : Turn on video stabilisation
-ev, --ev       : Set EV compensation - steps of 1/6 stop
-ex, --exposure : Set exposure mode (see Notes)
-awb, --awb     : Set AWB mode (see Notes)
-ifx, --imxfx   : Set image effect (see Notes)
-cfx, --colfx   : Set colour effect (U:V)
-mm, --metering : Set metering mode (see Notes)
-rot, --rotation        : Set image rotation (0-359)
-hf, --hflip    : Set horizontal flip
-vf, --vflip    : Set vertical flip
-roi, --roi     : Set region of interest (x,y,w,d as normalised coordinates [0.0-1.0])
-ss, --shutter  : Set shutter speed in microseconds
-awbg, --awbgains       : Set AWB gains - AWB mode must be off
-drc, --drc     : Set DRC Level (see Notes)
-st, --stats    : Force recomputation of statistics on stills capture pass
-a, --annotate  : Enable/Set annotate flags or text
-3d, --stereo   : Select stereoscopic mode
-dec, --decimate        : Half width/height of stereo image
-3dswap, --3dswap       : Swap camera order for stereoscopic
-ae, --annotateex       : Set extra annotation parameters (text size, text colour(hex YUV), bg colour(hex YUV))


Notes

Exposure mode options :
off,auto,night,nightpreview,backlight,spotlight,sports,snow,beach,verylong,fixedfps,antishake,fireworks

AWB mode options :
off,auto,sun,cloud,shade,tungsten,fluorescent,incandescent,flash,horizon

Image Effect mode options :
none,negative,solarise,sketch,denoise,emboss,oilpaint,hatch,gpen,pastel,watercolour,film,blur,saturation,colourswap,washedout,posterise,colourpoint,colourbalance,cartoon

Metering Mode options :
average,spot,backlit,matrix

Dynamic Range Compression (DRC) options :
off,low,med,high
$ raspiyuv --help
Runs camera for specific time, and take uncompressed YUV capture at end if requested

usage: raspiyuv [options]

Image parameter commands

-?, --help      : This help information
-w, --width     : Set image width <size>
-h, --height    : Set image height <size>
-o, --output    : Output filename <filename>. If not specifed, no image is saved
-v, --verbose   : Output verbose information during run
-t, --timeout   : Time (in ms) before takes picture and shuts down. If not specified set to 5s
-tl, --timelapse        : Timelapse mode. Takes a picture every <t>ms
-rgb, --rgb     : Save as RGB data rather than YUV
-cs, --camselect        : Select camera <number>. Default 0
-fp, --fullpreview      : Run the preview using the still capture resolution (may reduce preview fps)
-l, --latest    : Link latest complete image to filename <filename>
-k, --keypress  : Wait between captures for a ENTER, X then ENTER to exit
-s, --signal    : Wait between captures for a SIGUSR1 from another process
-set, --settings        : Retrieve camera settings and write to stdout
-bm, --burst    : Enable 'burst capture mode'

Preview parameter commands

-p, --preview   : Preview window settings <'x,y,w,h'>
-f, --fullscreen        : Fullscreen preview mode
-op, --opacity  : Preview window opacity (0-255)
-n, --nopreview : Do not display a preview window

Image parameter commands

-sh, --sharpness        : Set image sharpness (-100 to 100)
-co, --contrast : Set image contrast (-100 to 100)
-br, --brightness       : Set image brightness (0 to 100)
-sa, --saturation       : Set image saturation (-100 to 100)
-ISO, --ISO     : Set capture ISO
-vs, --vstab    : Turn on video stabilisation
-ev, --ev       : Set EV compensation - steps of 1/6 stop
-ex, --exposure : Set exposure mode (see Notes)
-awb, --awb     : Set AWB mode (see Notes)
-ifx, --imxfx   : Set image effect (see Notes)
-cfx, --colfx   : Set colour effect (U:V)
-mm, --metering : Set metering mode (see Notes)
-rot, --rotation        : Set image rotation (0-359)
-hf, --hflip    : Set horizontal flip
-vf, --vflip    : Set vertical flip
-roi, --roi     : Set region of interest (x,y,w,d as normalised coordinates [0.0-1.0])
-ss, --shutter  : Set shutter speed in microseconds
-awbg, --awbgains       : Set AWB gains - AWB mode must be off
-drc, --drc     : Set DRC Level (see Notes)
-st, --stats    : Force recomputation of statistics on stills capture pass
-a, --annotate  : Enable/Set annotate flags or text
-3d, --stereo   : Select stereoscopic mode
-dec, --decimate        : Half width/height of stereo image
-3dswap, --3dswap       : Swap camera order for stereoscopic
-ae, --annotateex       : Set extra annotation parameters (text size, text colour(hex YUV), bg colour(hex YUV))


Notes

Exposure mode options :
off,auto,night,nightpreview,backlight,spotlight,sports,snow,beach,verylong,fixedfps,antishake,fireworks

AWB mode options :
off,auto,sun,cloud,shade,tungsten,fluorescent,incandescent,flash,horizon

Image Effect mode options :
none,negative,solarise,sketch,denoise,emboss,oilpaint,hatch,gpen,pastel,watercolour,film,blur,saturation,colourswap,washedout,posterise,colourpoint,colourbalance,cartoon

Metering Mode options :
average,spot,backlit,matrix

Dynamic Range Compression (DRC) options :
off,low,med,high
Emotion APIと連携してみる
では、raspistillで画像保存後にcurlコマンドでEmotion APIをKickしてみたいと思います。
Microsoftのサンプルをそのままみると…以下のように書けばいいようです。
参照:Microsoft Cognitive Services
#!/usr/bin/env bash
curl -X POST "https://api.projectoxford.ai/emotion/v1.0/recognize" -H "Content-Type: application/json" -H "Ocp-Apim-Subscription-Key: 発行されたAPIキー" --data-ascii "{'url':'http://www.mis.med.akita-u.ac.jp/~kata/image/lenna/lenna'}"
このサンプルではWeb上の画像を解析するだけなので、cameraモジュールで撮影したファイルをAPIで解析するにはOctet-Streamで送信する必要がありますので、以下のように変更します。
#!/usr/bin/env bash
raspistill -rot 180 -o image.jpg
curl -X POST "https://api.projectoxford.ai/emotion/v1.0/recognize" -H "Content-Type: application/octet-stream" -H "Ocp-Apim-Subscription-Key: 発行されたAPIキー" --data-binary @image.jpg
サンプルとの大きな違いは
- Content-TypeをOctet-Streamにした点
--data-binary @image.jpgでContent-bodyを撮影したファイルにしている点
です。
このようにしてraspistillコマンドで撮影した画像をEmotion APIへ送信できます。
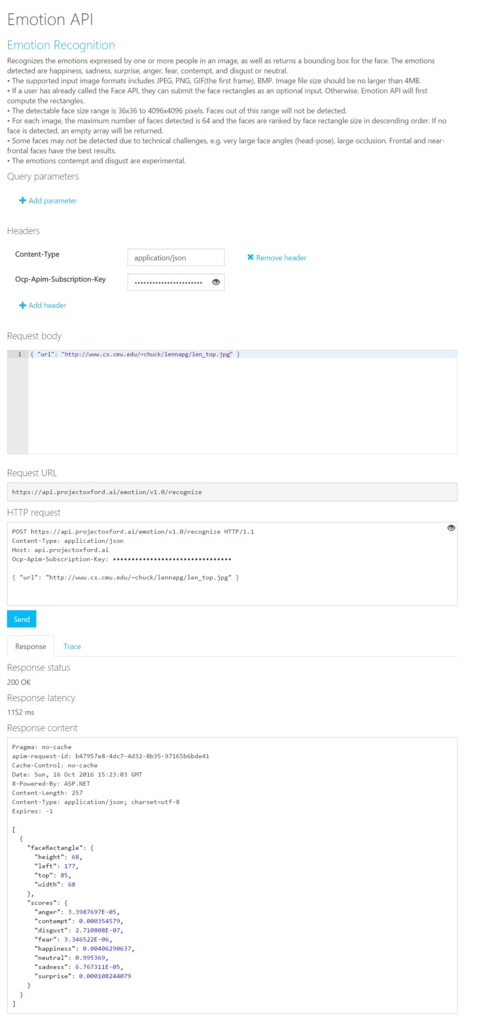
結果をみると
[{"faceRectangle":{"height":460,"left":1133,"top":756,"width":460},"scores":{"anger":0.0148205226,"contempt":0.0202304367,"disgust":0.00199702079,"fear":0.000178213842,"happiness":0.0006098823,"neutral":0.946034551,"sadness":0.013939213,"surprise":0.00219016313}}]
上記のようなJSONデータが帰ってきています。
ちなみにraspistillコマンドに-rot 180というオプションを指定していますが、cameraモジュールをフィルムケーブルを指す部分がモジュールの下部になり、
安定しておこうとすると、カメラの上下が反対になってしまうので入れているだけです。実際にはraspistill -o image.jpgで問題ありません。
MicrosoftのEmotion APIは顔が上下反対になっていたりすると認識できないようなのでそれに対する手になります。
やっほい!うまくいきました!
所詮shじゃん?もう少しなんとかならないの?
ですよね~。ってことでpythonからも触れるようにしたいと思います。
pythonからcameraモジュールを制御してみる
pythonからcameraモジュールにアクセスするためにpicameraというモジュールを導入します。詳しくは以下のサイトを参考にします。
参照:Python picamera - Raspberry Pi Documentation
参照:Documentation for picamera — Picamera 1.2 documentation
picameraをインストールする
pipでもいいのですが、Raspberry Piなのでapt-getでインストールすることにします。
$ sudo apt-get install python-picamera
これで完了です。もしpipでインストールするなら以下の様になるかと思います。(これでいいはず…)
$ sudo pip install picamera
対話型のインターフェースでimportしてみてエラーが出なければ正常にインストールできています。
$ python
Python 2.7.9 (default, Mar  8 2015, 00:52:26)
[GCC 4.9.2] on linux2
Type "help", "copyright", "credits" or "license" for more information.
>>> import picamera
>>>
picameraを使用してみる
picameraのインポートが成功したのでpythonで撮影したカメラ画像をEmotionAPIに送ってみましょう。途中のコードに
with picamera.PiCamera() as camera:
        camera.start_preview()
        camera.hflip = True
        camera.vflip = True
        time.sleep(2) #カメラ初期化
        camera.capture('foo.jpg')
となっている部分がありますが、この部分がカメラ撮影をしてfoo.jpgというファイルに出力している部分です。hflipとvfilpの設定がありますが、カメラの置き方によって画像の方向が変わる可能性があるので、適宜変更してください。ちなみにEmotionAPIでは顔が正しい上下関係頭が上で顎が下になっているような画像でないと正しい結果を返さないので注意が必要です。(くどいですが)
#!/usr/bin/env python
# -*- coding: utf-8 -*-

import requests
import json
import types
import time
import picamera

with picamera.PiCamera() as camera:
        camera.start_preview()
        camera.hflip = True
        camera.vflip = True
        time.sleep(2) #カメラ初期化
        camera.capture('foo.jpg')

url = 'https://api.projectoxford.ai/emotion/v1.0/recognize'
headers = {'Content-type': 'application/octet-stream', 'Ocp-Apim-Subscription-Key':'発行されたAPIキー'}
payload = open('./foo.jpg', 'rb').read()

r = requests.post(url, data=payload, headers=headers)
data = r.json()
dict = data[0]['scores']
max_key = max(dict, key=(lambda x: dict[x]))

print "key: %s,\t value:%f" %(max_key, dict[max_key])
後は、過去のエントリーと概ね変わりはないと思います。
これでRaspberryPiとカメラがあれば表情を読みとりGPIOを制御するなんてこともできそうですね。次はそういうのを作ってみたいと思います。
