前回のエントリーではLチカ後にHID(USBのヒューマン・インターフェース・デバイス)のテストのサンプルスケッチを動作してみたのですが、軽くトラブっていました。
一部のソースコードをコメントアウトして動作ができました。とはいえ、原因の特定をしないと気持ちが悪いので もう少し掘り下げてみます。
もう少し調べてみる
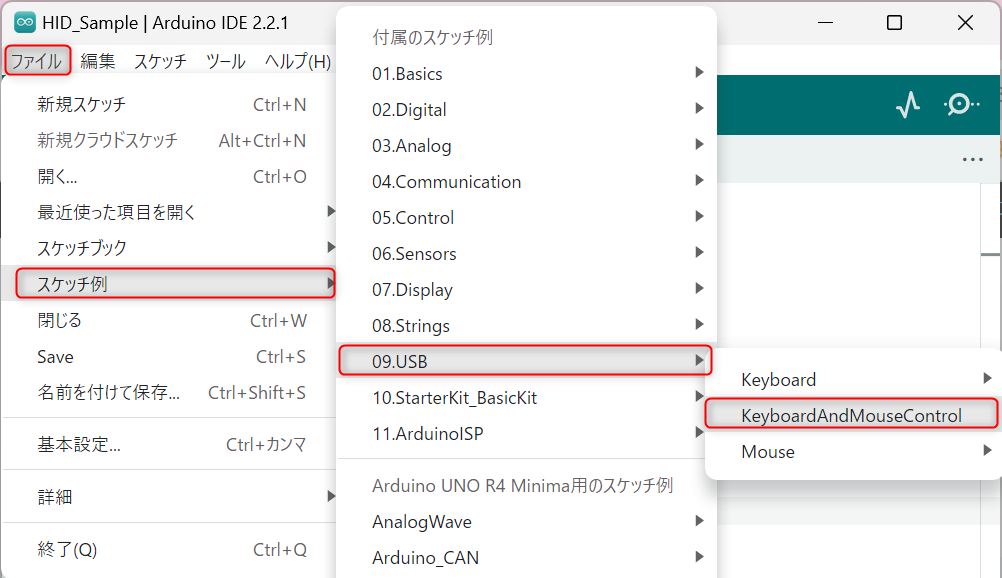
使用しているのは以下のスケッチ例になります。

/*
  KeyboardAndMouseControl
  Controls the mouse from five pushbuttons on an Arduino Leonardo, Micro or Due.
(中略)
  This example code is in the public domain.
  https://www.arduino.cc/en/Tutorial/BuiltInExamples/KeyboardAndMouseControl
*/
#include "Keyboard.h"
#include "Mouse.h"
// set pin numbers for the five buttons:
const int upButton = 2;
const int downButton = 3;
const int leftButton = 4;
const int rightButton = 5;
const int mouseButton = 6;
void setup() {  // initialize the buttons' inputs:
  pinMode(upButton, INPUT);
  pinMode(downButton, INPUT);
  pinMode(leftButton, INPUT);
  pinMode(rightButton, INPUT);
  pinMode(mouseButton, INPUT);
  Serial.begin(9600);
  // initialize mouse control:
  Mouse.begin();
  Keyboard.begin();
}
void loop() {
  // use serial input to control the mouse:
  if (Serial.available() > 0) {
    char inChar = Serial.read();
    switch (inChar) {
      case 'u':
        // move mouse up
        Mouse.move(0, -40);
        break;
      case 'd':
        // move mouse down
        Mouse.move(0, 40);
        break;
      case 'l':
        // move mouse left
        Mouse.move(-40, 0);
        break;
      case 'r':
        // move mouse right
        Mouse.move(40, 0);
        break;
      case 'm':
        // perform mouse left click
        Mouse.click(MOUSE_LEFT);
        break;
    }
  }
  // use the pushbuttons to control the keyboard:
  if (digitalRead(upButton) == HIGH) {
    Keyboard.write('u');
  }
  if (digitalRead(downButton) == HIGH) {
    Keyboard.write('d');
  }
  if (digitalRead(leftButton) == HIGH) {
    Keyboard.write('l');
  }
  if (digitalRead(rightButton) == HIGH) {
    Keyboard.write('r');
  }
  if (digitalRead(mouseButton) == HIGH) {
    //Keyboard.write('m'); // この行をコメントアウトするとうまく動く
  }
}
動作しないのはdigitalRead(mouseButton)であると勘違いしていましたが、よくよく見るとKeyboard.write('m')ですよね🥲この部分の処理は「シリアルポートへmのキャラクタを書き込む処理」を行っています。また、動作しないというのは文字足らずで、「シリアルポートのデータ送受信が行えていない」という現象でした。
では、このサンプルスケッチではマウスの左ボタンの処理をD6で行っていましたので、他のデジタルピンでは動きに変化があるか確認してみます。
すると、D0~D5、D8~D11までは正常に動作しました。NGのdigitalピンはD6,D7,D12,D13(ただしD13はbuilt-inLEDになるので、もちろん使用しないほうがいいですよね)となります。以下の様にスケッチを変更すると動作します。シリアルの動作の確認のため、built-inのLEDを使用してデータ受信したときにON/OFFさせています。
#include "Keyboard.h"
#include "Mouse.h"

// set pin numbers for the five buttons:
const int upButton = 2;
const int downButton = 3;
const int leftButton = 4;
const int rightButton = 5;
const int mouseButton = 8;  // 6,7,12,13 NG?
//debug用
int LED_status = 0;

void setup() {
  // initialize the buttons' inputs:
  pinMode(upButton, INPUT);
  pinMode(downButton, INPUT);
  pinMode(leftButton, INPUT);
  pinMode(rightButton, INPUT);
  pinMode(mouseButton, INPUT);

  //debug用
  pinMode(LED_BUILTIN, OUTPUT);
  LED_status = LOW;
  digitalWrite(LED_BUILTIN, LED_status);

  // initialize serial control:
  Serial.begin(9600);

  // initialize mouse control:
  Mouse.begin();
  Keyboard.begin();
}

void loop() {
  // use serial input to control the mouse:
  if (Serial.available() > 0) {
    char inChar = Serial.read();

    //debug用
    LED_status ^= 1;
    digitalWrite(LED_BUILTIN, LED_status);

    switch (inChar) {
      case 'u':
        // move mouse up
        Mouse.move(0, -40);
        break;
      case 'd':
        // move mouse down
        Mouse.move(0, 40);
        break;
      case 'l':
        // move mouse left
        Mouse.move(-40, 0);
        break;
      case 'r':
        // move mouse right
        Mouse.move(40, 0);
        break;
      case 'm':
        // perform mouse left click
        Mouse.click(MOUSE_LEFT);
        break;
    }
  }
  // use the pushbuttons to control the keyboard:
  if (digitalRead(upButton) == HIGH) {
    Keyboard.write('u');
  }
  if (digitalRead(downButton) == HIGH) {
    Keyboard.write('d');
  }
  if (digitalRead(leftButton) == HIGH) {
    Keyboard.write('l');
  }
  if (digitalRead(rightButton) == HIGH) {
    Keyboard.write('r');
  }
  if (digitalRead(mouseButton) == HIGH) {
    Keyboard.write('m');  // コメントアウトしなくても動作する
  }
}
おわりに
サンプルスケッチを少し修正することでうまく動作しました。まだしっくりはしていないのですが、一応解決なのかも。
データシートもこうかいされているので、そちらも参照してみたのですが、それらしき記載がなく。 もしかしたら自分の持っているものの固有の挙動なのか調べたいのですが、どうしたものか。
【参考:データシートのページ】 https://docs.arduino.cc/hardware/uno-r4-minima/
シリアル処理、HIDの処理も公式ページにあるのですが、ピンで使用できる・できないという部分の処理は使用していないんですよね~。