RaspberryPi 4にメモリ8Gモデルがリリースされるそうです。メモリが多いのはとてもいいことだと思うのです。だたRaspberryPiは、これからどっちの方向に行くのか、よくわからない状況かなと思うのは自分だけでしょうか?
値段が落ち着いたら購入しようかな?とは思うのですが、64bitOSじゃねえのに大丈夫なの?と思っていたらRaspbianの64bit化もできるみたいですね。その上、先日新しいバージョンがリリースされていました(ただし公式には32bit版しかありません)。更に今回からは名称がRaspbianからRaspberry Pi OSに変更されるようです。以下にリリースノートをおいておきます。個人的にはNode-REDのバージョンが標準で1.06になっている点が気になりました。
http://downloads.raspberrypi.org/raspios_armhf/release_notes.txt
さて、一応これで新しいRaspberryPiのOSがでたということもあり、気になっていたことを試してみたいと思います。
忘れていましたがもう一ついいことがありました。少し前に封印したSanDsikのUSBメモリと同じものが家で見つかりました。ちゃんとUSB3.0でも認識しているので新規購入しないで済みました\(^o^)/
RaspberryPi 4Bは、USBから起動がまだできない様子なのですが、bootパーティションがUSBメモリ上にあるとそれを認識できないというのが原因のようです。なので、bootパーティションがSDカードメモリにあり、rootパーティションがUSBメモリという組み合わせであれば起動後にUSB3.0に対応したメモリやSSDなどのスピードを活かすことができるはずです。問題があるとすればSDメモリは挿入したままである必要があるので、起動時に少し時間がかかるという点でしょうか。
そのうち、何もしなくても対応するものと思いますが、試してみます。
使用するメモリ
今回はSDカードは以下のものを使用。そこそこ速いです。
USB3のストレージデバイスは先日見つかったUSBメモリSanDsikのUrtraFit 32G。本当はSSDにするといいんだろうけど、金欠なのでこれを使います。
OS
今回使用するのはリリースされたばかりのRaspberry Pi OS (32-bit) with desktop、2020-05-27-raspios-buster-armhfのイメージを使用します。

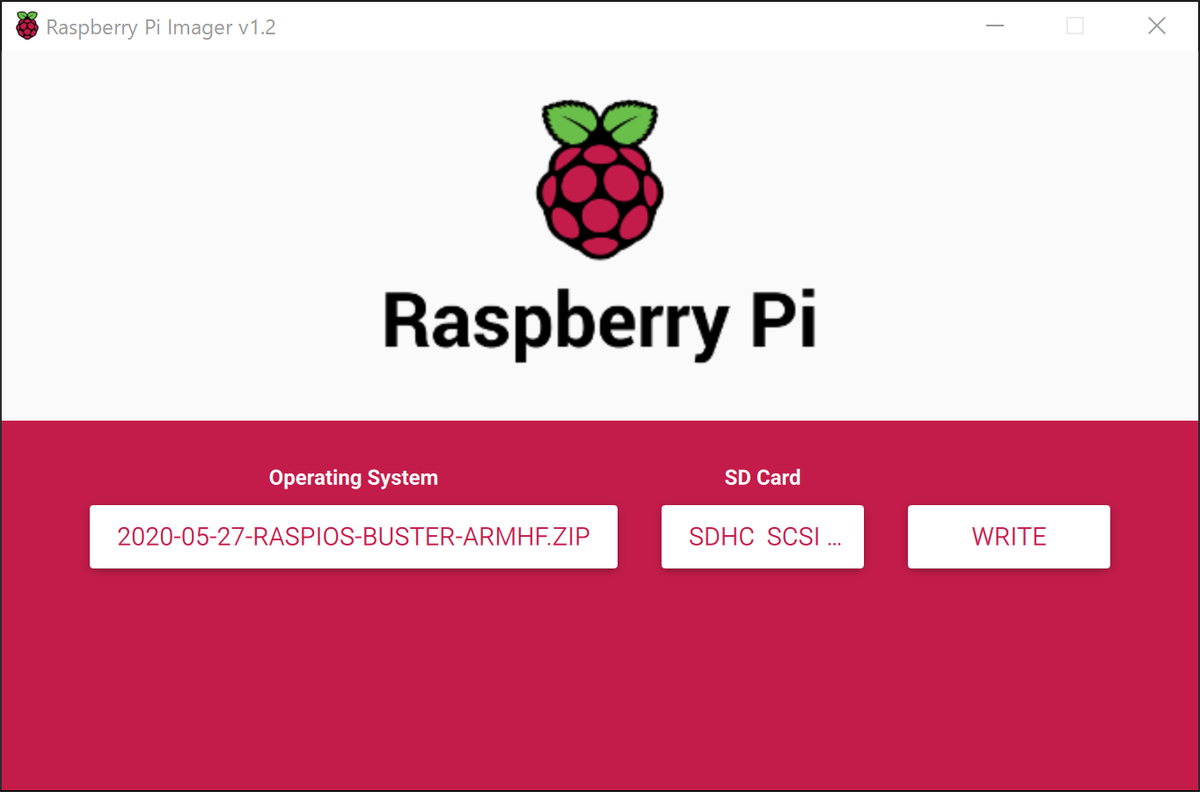
Raspberry Pi Imagerでも問題なく書き込めます。

起動したときのバージョンは以下のようになっていました。
$ uname -a
Linux raspberrypi 4.19.118-v7l+ #1311 SMP Mon Apr 27 14:26:42 BST 2020 armv7l GNU/Linux

$ lsb_release -a
No LSB modules are available.
Distributor ID: Raspbian
Description:    Raspbian GNU/Linux 10 (buster)
Release:        10
Codename:       buster
ベンチマークアプリ
ディスク(SDカードメモリ・USBメモリ)のスピードをチェックするアプリもインストールしておきます。今回使用するのは、いろいろなベンチマークができるsysbenchを使用します。
sysbenchのインストール
sysbenchはaptコマンドでインストールすることができます。以下のように実行すればインストールされます。
$ sudo apt install sysbench
今回使用するのはストレージのベンチマークになるので以下のオプションをつけていくことになります。 「–test=fileio」オプションを指定すれば、ファイルの読み書きに関するベンチマークを行えます。 この場合、更に「–file=test-mode」オプションでテストモードを指定する事ができるようになっています。
| モード | 説明 |
|---|---|
| seqwr | シーケンシャル書き込み |
| seqrewr | シーケンシャル読み書き |
| seqrd | シーケンシャル読み出し |
| rndrd | ランダム読み出し |
| rndwr | ランダム書き込み |
| rndrw | ランダム読み書き |
今回はシーケンシャル読み書き(seqrewr)を使用します。
シーケンシャル読み書き(seqrewr)のコマンド
$ sysbench --test=fileio --file-test-mode=seqrewr run
(重要)ベンチマークを行う場合には事前にベンチマーク対象となるファイルを作成しておきます。作成しなくても、ベンチマーク時に作成はしてくれますが、削除はしてくれないので注意です。今回は念の為作成しています。
作業用ファイル作成のコマンド
$ sysbench --test=fileio prepare
作成されるとこんな感じでファイルが作成されます。
 $ ls
Bookshelf      test_file.120  test_file.3   test_file.53  test_file.77
test_file.0    test_file.121  test_file.30  test_file.54  test_file.78
test_file.1    test_file.122  test_file.31  test_file.55  test_file.79
test_file.10   test_file.123  test_file.32  test_file.56  test_file.8
test_file.100  test_file.124  test_file.33  test_file.57  test_file.80
test_file.101  test_file.125  test_file.34  test_file.58  test_file.81
test_file.102  test_file.126  test_file.35  test_file.59  test_file.82
test_file.103  test_file.127  test_file.36  test_file.6   test_file.83
test_file.104  test_file.13   test_file.37  test_file.60  test_file.84
test_file.105  test_file.14   test_file.38  test_file.61  test_file.85
test_file.106  test_file.15   test_file.39  test_file.62  test_file.86
test_file.107  test_file.16   test_file.4   test_file.63  test_file.87
test_file.108  test_file.17   test_file.40  test_file.64  test_file.88
test_file.109  test_file.18   test_file.41  test_file.65  test_file.89
test_file.11   test_file.19   test_file.42  test_file.66  test_file.9
test_file.110  test_file.2    test_file.43  test_file.67  test_file.90
test_file.111  test_file.20   test_file.44  test_file.68  test_file.91
test_file.112  test_file.21   test_file.45  test_file.69  test_file.92
test_file.113  test_file.22   test_file.46  test_file.7   test_file.93
test_file.114  test_file.23   test_file.47  test_file.70  test_file.94
test_file.115  test_file.24   test_file.48  test_file.71  test_file.95
test_file.116  test_file.25   test_file.49  test_file.72  test_file.96
test_file.117  test_file.26   test_file.5   test_file.73  test_file.97
test_file.118  test_file.27   test_file.50  test_file.74  test_file.98
test_file.119  test_file.28   test_file.51  test_file.75  test_file.99
test_file.12   test_file.29   test_file.52  test_file.76
作業用ファイル削除のコマンド
$ sysbench --test=fileio cleanup
これらを使用してベンチマークを行っていきます。
SDカードでのベンチマーク値
以降する前にSDカードでベンチマーク値を測ってみます。
$ sudo apt install sysbench
Reading package lists... Done
Building dependency tree
Reading state information... Done
The following additional packages will be installed:
  libmariadb3 mariadb-common mysql-common

 $ sysbench --test=fileio --file-test-mode=seqrewr run
sysbench 0.4.12:  multi-threaded system evaluation benchmark

Running the test with following options:
Number of threads: 1

Extra file open flags: 0
128 files, 16Mb each
2Gb total file size
Block size 16Kb
Periodic FSYNC enabled, calling fsync() each 100 requests.
Calling fsync() at the end of test, Enabled.
Using synchronous I/O mode
Doing sequential rewrite test
Threads started!
Done.

Operations performed:  0 Read, 131072 Write, 128 Other = 131200 Total
Read 0b  Written 2Gb  Total transferred 2Gb  (6.1427Mb/sec)
  393.13 Requests/sec executed

Test execution summary:
    total time:                          333.4057s
    total number of events:              131072
    total time taken by event execution: 315.1549
    per-request statistics:
         min:                                  0.03ms
         avg:                                  2.40ms
         max:                              13743.32ms
         approx.  95 percentile:               1.86ms

Threads fairness:
    events (avg/stddev):           131072.0000/0.00
    execution time (avg/stddev):   315.1549/0.00

$ sysbench --test=fileio cleanup
sysbench 0.4.12:  multi-threaded system evaluation benchmark

Removing test files...
今回のベンチマークでは16MBのファイルを128個、合計2GBの書き込みを行うというものです。 その処理時間は333.4057秒という結果。(単位は"b"ですがbitではなくbyteなので注意)スピードは6.1427Mb/secとなっていました。
ランダムアクセスのベンチマークも考えましたが時間がかなりかかってしまうので 今回はやめておきます。
では、このSDカードからUSBメモリにrootパーティションを変更していきます。
rootパーティションをUSBメモリに変更する
RaspberryPiにUSBメモリを挿して以下の作業を行います。
SDカードの内容をUSBメモリにコピーする
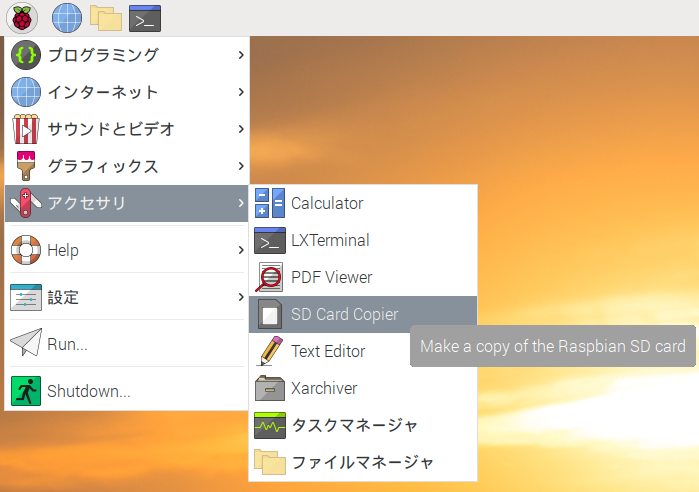
X側にあるSD Card Copierというアプリを使用します。画面左上にあるラズベリーパイのロゴのボタンを押して
【アクセサリ】→【SD Card Copier】を選択します。

すると以下のようなウインドウが開きます。

ここで以下のように設定を行います。
【New Partition UUIDs】のチェックボックスに必ずチェックをいれて【Start】ボタンをクリックします。

書き込み先のストレージが削除される旨のダイアログが表示されるので【Yes】ボタンをクリックします。

するとパーティションごとに処理が行われ

SDカードの内容がUSBメモリにコピーされます。以下の様に表示されればOKです。アプリを終了させます。

ここで重要なのはダイアログ中に表示されていた【New Partition UUIDs】のチェック部分なので間違えないようにしてください。
USBメモリの/boot/cmdline.txtを編集する
つづいてはSDカードの/bootパーティションにあるcmdline.txtファイルを編集します。
この/boot/cmdline.txt起動時にパーティション設定情報を読み込んでいます。
まずは、各ストレージの各パーティションの情報を以下のように確認します。
$ sudo blkid
/dev/mmcblk0p1: LABEL_FATBOOT="boot" LABEL="boot" UUID="【SDカードのbootパーティションのUUID】" TYPE="vfat" PARTUUID="【SDカードのbootパーティションのPARTUUID】"
/dev/mmcblk0p2: LABEL="rootfs" UUID="【SDカードのrootパーティションのUUID】" TYPE="ext4" PARTUUID="【SDカードのrootパーティションのPARTUUID】"
/dev/sda1: LABEL_FATBOOT="boot" LABEL="boot" UUID="【USBメモリのbootパーティションのUUID】" TYPE="vfat" PARTUUID="【USBメモリのbootパーティションのPARTUUID】"
/dev/sda2: LABEL="rootfs" UUID="【USBメモリのrootパーティションのUUID】" TYPE="ext4" PARTUUID="【USBメモリのrootパーティションのPARTUUID】"
/dev/mmcblk0: PTUUID="【SDカードのPTUUID】" PTTYPE="dos"
ここでメモを取るのは【USBメモリのrootパーティションのPARTUUID】となります。起動時にこの値のあるパーティションのPARTUUIDを/rootパーティションにするように/boot/cmdline.txtに書き込みます。
以下のようにファイルを編集します。(vimがなければnanoでもviでも大丈夫です)
必要があれば、このファイルのバックアップをとってもいいかなと思います。(Windows側からもこのパーティションは編集可能)ここでバックアップを取らなくてもUSB側の/bootパーティションには同じものが入っているので手間はかかりますが復帰はできます。
$ sudo vim /boot/cmdline.txt
ファイルを開くと以下のようになっているので、この【SDカードのrootパーティションのPARTUUID】の部分を先程確認した【USBメモリのrootパーティションのPARTUUID】に変更します。
編集前
console=serial0,115200 console=tty1 root=PARTUUID=【SDカードのrootパーティションのPARTUUID】 rootfstype=ext4 elevator=deadline fsck.repair=yes rootwait quiet splash plymouth.ignore-serial-consoles
編集後
console=serial0,115200 console=tty1 root=PARTUUID=【USBメモリのrootパーティションのPARTUUID】 rootfstype=ext4 elevator=deadline fsck.repair=yes rootwait quiet splash plymouth.ignore-serial-consoles
ここまで来たらOSを再起動します。再起動時はSDカード、USBメモリは必ず指した状態で行ってください。
USBメモリから起動後の確認
起動には少し時間がかかるかもしれませんが、問題なく起動すると思います。
起動したらまずはディスクのマウント情報を確認します。USBメモリは/dev/sdaになっているので、その中の/dev/sda2のパーティションが/がとしてマウントされていれば無事に成功です。
$ mount | grep sda
/dev/sda2 on / type ext4 (rw,noatime)
/dev/sda1 on /boot type vfat (rw,relatime,fmask=0022,dmask=0022,codepage=437,iocharset=ascii,shortname=mixed,errors=remount-ro)
ディスクのベンチマークをとってみる
先程と同様にsysbenchでベンチマークをとってみます。
$ sysbench --test=fileio prepare
sysbench 0.4.12:  multi-threaded system evaluation benchmark

128 files, 16384Kb each, 2048Mb total
Creating files for the test...

$ sysbench --test=fileio --file-test-mode=seqrewr run
sysbench 0.4.12:  multi-threaded system evaluation benchmark

Running the test with following options:
Number of threads: 1

Extra file open flags: 0
128 files, 16Mb each
2Gb total file size
Block size 16Kb
Periodic FSYNC enabled, calling fsync() each 100 requests.
Calling fsync() at the end of test, Enabled.
Using synchronous I/O mode
Doing sequential rewrite test
Threads started!
Done.

Operations performed:  0 Read, 131072 Write, 128 Other = 131200 Total
Read 0b  Written 2Gb  Total transferred 2Gb  (29.387Mb/sec)
 1880.74 Requests/sec executed

Test execution summary:
    total time:                          69.6918s
    total number of events:              131072
    total time taken by event execution: 65.8545
    per-request statistics:
         min:                                  0.03ms
         avg:                                  0.50ms
         max:                                340.16ms
         approx.  95 percentile:               0.10ms

Threads fairness:
    events (avg/stddev):           131072.0000/0.00
    execution time (avg/stddev):   65.8545/0.00

$ sysbench --test=fileio cleanup
sysbench 0.4.12:  multi-threaded system evaluation benchmark

Removing test files...
処理時間は 69.6918秒という結果になります。スピードは29.387Mb/secとなっていました。 体感でもわかるぐらいかなり速くなったようです!ヤッター!
結果をまとめると以下のようになっています。
| ストレージメディア | 転送速度 | 時間 |
|---|---|---|
| SDカードメモリ | 6.1427Mb/sec | 333.4057秒 |
| USBメモリ(USB3.0接続) | 29.387Mb/sec | 69.6918秒 |
| (参考)USBメモリ(USB2.0接続) | 16.968Mb/sec | 120.6999秒 |
USBメモリの転送速度は235.096bpsといったところです。CrystalDiskMarkとは図り方が違うのでわかりにくいですが、かなりのスピード。転送スピードもSDカードメモリと比較して、5倍弱アップと嬉しい結果です。USB2.0と比べても2倍程度アップしています。USB3.0 バンザイ!
おわりに
USB3.0がついているのでそちらにストレージをつけるとどうなるのかなと思いましたが、非常に高速で動作するようです。SSDなどを使用すればもっとはやくなるのかなとかなり期待が高まります。
ただ、デフォルト状態ではRaspberryPi3B+のようにUSBメモリだけから起動できないのはちょっと残念という状況です。 それもまあ時間の問題かなと期待して待っていたいと思います。
【参考】